After spending countless hours combing the floors of ABC Carpet & Home for something as beautiful as it was cost-effective, I deemed the search hopeless and left each time with a light bag and a heavy heart. Over my many futile trips to the store, I decided to take matters into my own hands and make the things that I want. No more siren calls for me. This is entry number one. The pillowcase...
Hope you like!
ex oh, the missus
The inspiration
The creation
Click the 'Read More' button to follow the step-by-step photos!
The method
Supplies: Bucket of warm to hot water, dye, rubber bands and your fabric. Natural fabrics take dye better than synthetics. You'll also need some cotton upholstery piping, if you choose the slightly harder route.
Cut 2 pieces of fabric about the size of your pillow. I left about 2" extra all the way around. One piece needs to be about 4" longer than the other (that's the back side).
Mix in your dye. I used about a half package of the Rit dye in black for mine.
Tie a rubber band at the center of your square.
Continue tying...
Dip it.
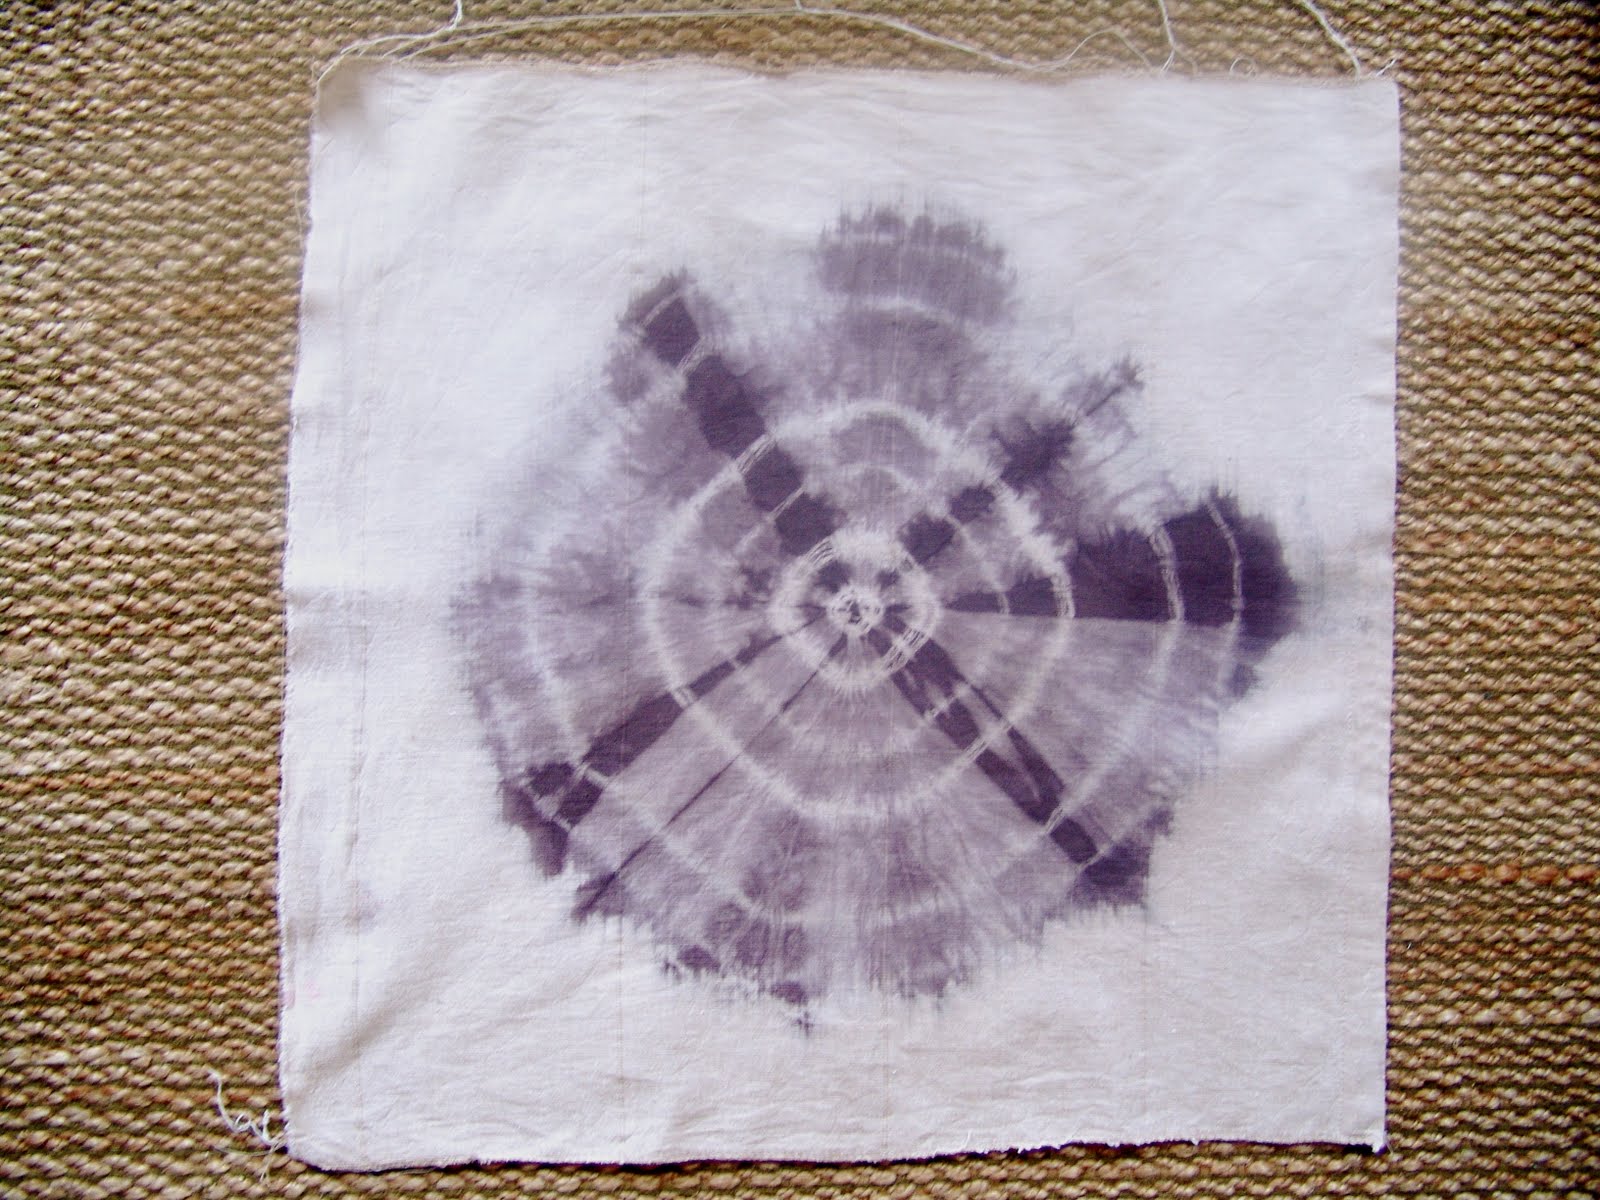
I left mine in for about 20 minutes. The longer you leave it in the darker it will be.
Wash with detergent until water runs clear and hang that shit to dry.
Now you have time to smell the flowers... This is my little fire-escape garden.
That was nice.
Dried!
This is some cotton upholstery piping. Make sure you have enough to go all the way around your fabric, plus a little extra, just in case. *Note: You can also make the pillowcase without the piping and if you so choose, ignore the next few steps...
For this next step you'll need enough fabric to cover the length of your piping x 3" wide. I used a zipper foot on my machine. Overlap the edge of your fabric about 1". Fold over and sew.
Ida Bean loves to help!
Next take your fabric for the back side of the pillowcase and cut it in half. You'll then fold over about 1" on the cut line and sew it down to make a nice hem. (I used an old curtain so mine was already hemmed!)
Next line up the back pieces with the front piece so that they all fit together in a square, but that the two back pieces overlap. Then to attach the back pieces together, sew them together on the edge where they over lap and meet. *Note: If you choose not to use piping, this is where you would simply sew around the edges to merge the front and back together.
Pin your piping around the front side of your pillowcase. It's easiest if you pin then sew one side at a time. I left a few inches of the piping to trail off the corner to make attaching the two ends easier.
Using the zipper foot again, stitch the piping down to the front along the edges. Keep in mind the corners! They're a bit tricky.
This is what the front should look like after.
Leaving the front side of the pillow face up, place the back piece face down onto it and pin into place. Sew along the edge of the piping (which will be on the inside) as close as possible.
This is what it should look like after.
Flip your pillowcase inside out and VOILÀ!
Your beautiful, fairly easy-to-make, tie dyed pillowcase!
Ahh, it feels nice to DIMFS.
Please feel free to ask me questions if there's any confusion!
We're tired of DIY. We tell 'em DIYFS!